Renovating your home can be an exciting yet daunting process, especially when it involves tackling elements like drywall removal. Whether you’re knocking down walls to create more space or updating your home’s aesthetic, removing drywall is often one of the first significant steps in the process. However, managing drywall removal can be more complex than it initially appears. From dealing with large, heavy panels to managing dust and debris, there are several important considerations to ensure the job is done safely, efficiently, and without unnecessary headaches.
In this article, we’ll walk through essential tips for handling drywall removal during a renovation, ensuring you are prepared for what’s to come. While you may be eager to start the demolition phase of your project, taking the time to understand the best practices can save you a great deal of time, energy, and even money in the long run. Drywall removal doesn’t have to be a headache—it can be a manageable and rewarding part of your renovation journey.
Planning Ahead: Why Preparation Matters
Before you start swinging the hammer, take a step back and assess the space. Drywall removal might seem like a simple task, but it’s essential to have a clear understanding of your surroundings. The first step in any renovation is always preparation. Start by mapping out the areas where you’ll be removing drywall. Be mindful of electrical wiring, plumbing, and HVAC systems that could be hidden behind the drywall. While the walls may look simple, there’s often a complex web of utilities running through them, and damaging these systems can be both costly and dangerous.
One of the most important things to do before starting drywall removal is to clear the area. Move any furniture, décor, and valuables out of the space to avoid unnecessary damage. You’d be surprised how quickly debris can fly in every direction once the drywall starts coming down. You might even consider covering your floors with protective sheeting or drop cloths to catch falling dust and debris. Taking these steps ensures that the mess stays contained and helps you focus on the task at hand.
Safety First: Protecting Yourself and Others
When dealing with drywall removal, safety should always be your top priority. There’s no point in completing your project only to end up with an injury that sidelines the rest of the renovation. Begin by wearing the proper protective gear, such as safety glasses, gloves, and a dust mask. Drywall dust can be incredibly irritating to your respiratory system, so wearing a mask will help protect your lungs. Additionally, gloves will keep your hands safe from sharp edges that can easily cause cuts.
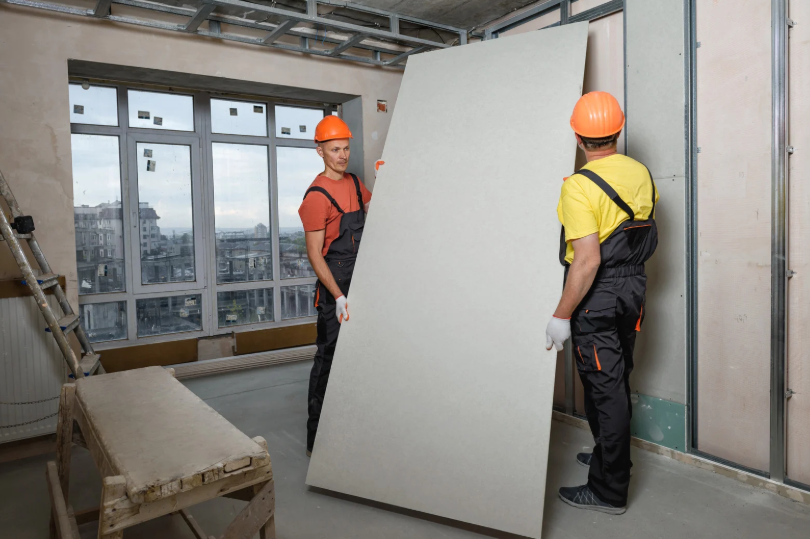
If you’re working on a large project, consider wearing a hard hat, especially if you’ll be dealing with ceiling drywall removal. You’ll be in close proximity to a lot of falling debris, and protecting your head should be a priority. Don’t forget sturdy footwear, too—construction boots with steel toes are ideal. This is especially important when dealing with the inevitable piles of debris that will accumulate as you remove the drywall.
Another safety consideration when removing drywall is the weight of the panels. Drywall is heavy, and depending on the size of the sheet, it can be difficult to handle alone. Don’t hesitate to enlist a friend or a professional to help lift and remove large panels. By getting a second pair of hands, you ensure that the task is completed without risk of injury. If the walls you’re removing are particularly large, consider renting or purchasing a drywall lift to make the process easier and safer.
Efficient Demolition: The Art of Removing Drywall
Once you’ve taken the necessary safety precautions, it’s time to get to work. The first step in drywall removal is usually cutting the drywall along the edges where it meets the ceiling, floor, or adjacent walls. This can be done using a utility knife. Score along these edges, making sure to apply consistent pressure. The cleaner the cut, the easier it will be to remove the drywall without damaging other areas of your home.
For larger drywall sheets, the goal is to minimize damage. You don’t want to completely pulverize the panels—breaking the drywall into smaller chunks can make disposal more difficult. Instead, focus on gently prying the drywall off the studs. Begin at one corner and work your way across the wall. If the drywall is stubborn, you may need to use a crowbar or pry bar to loosen it further. Just be sure not to apply too much force in one spot, as this could cause unnecessary damage to the studs.
As you work through the removal process, be sure to keep an eye on the studs behind the drywall. While it’s unlikely that they’ll need replacement, they may need some light cleaning or prepping before you put up new drywall. If you notice any damage to the studs, such as rot or signs of mold, take the time to address it now, as this can save you from dealing with more significant issues later on in your renovation.
Managing Dust and Debris: Cleanup is Key
One of the most challenging aspects of drywall removal is the mess that comes with it. Drywall dust gets everywhere, and it can be difficult to contain. Fortunately, there are some tricks to managing the cleanup process as you go along. As mentioned earlier, laying down protective sheeting or drop cloths is a must. This will prevent the dust from embedding into your carpet or hardwood floors, making it easier to clean up later.
If possible, close off the room from the rest of the house. Use plastic sheeting to create a barrier and keep the dust contained in the work area. Make sure to seal off any vents or air ducts to prevent dust from traveling through your HVAC system. It’s also helpful to have a wet/dry vacuum on hand to immediately clean up the larger debris. A vacuum with a HEPA filter is especially useful for drywall dust, as it will help trap the fine particles that can easily escape standard vacuum cleaners.
After the drywall is removed, you’ll need to do a more thorough cleaning. Dust will have settled on every surface, so take the time to wipe down all areas with a damp cloth. A good cleaning can make the entire space feel more livable again and will allow you to start fresh for the next phase of your renovation.
Disposal: Getting Rid of the Old Drywall
When it comes to getting rid of drywall, there are a few options available. The first option is to handle disposal yourself. Many homeowners choose to rent a dumpster for their renovation projects, which makes it easy to toss the drywall and other debris in one place. However, this method requires a bit of coordination. You’ll need to make sure the dumpster is large enough for the job and is placed in an accessible location on your property.
If renting a dumpster isn’t ideal for you, another option is to hire a professional junk removal service. These services are experienced in handling construction debris like drywall and can ensure that the material is disposed of properly. They’ll also save you the trouble of hauling the drywall to a landfill or recycling center. Many junk removal services, such as Clutter Ninjas Junk Removal, provide this service, and it can be an invaluable time-saver when you’re juggling multiple aspects of a renovation.
Dealing with Hazardous Materials
Sometimes, drywall removal can uncover more than you bargained for. If you live in an older home, the drywall may contain hazardous materials like lead paint or asbestos. It’s critical to have these materials tested before proceeding with the demolition process. If your home does contain asbestos or lead, it’s crucial to hire a professional abatement team to handle the removal safely.
Do not attempt to remove hazardous materials yourself. The risks of exposure to asbestos and lead are serious and can have long-term health consequences. A professional removal service will have the expertise, tools, and protective gear to safely handle the situation. They’ll also ensure the materials are disposed of in compliance with local regulations, so you don’t run into legal trouble later.
The Final Touch: Preparing for New Drywall Installation
After the old drywall has been removed, you’re ready to move forward with the next phase of your renovation. Before installing new drywall, take the opportunity to inspect the studs and ensure they’re in good condition. If you plan to reroute electrical wiring, plumbing, or HVAC systems, now is the time to do it. This is also a great time to reinforce the studs if needed, as adding new drywall will require secure anchoring.
Once everything is prepared, you can begin installing the new drywall. This process may require professional help, particularly if you’re working with large panels or intricate designs. If you’re unsure, it’s always better to seek expert assistance than to risk errors that may lead to additional repairs down the line.
Conclusion
Drywall removal may be a messy and challenging task, but with the right preparation and mindset, it can be one of the more rewarding parts of your home renovation. Whether you’re tackling a DIY project or hiring professionals to help, taking steps to ensure safety, minimize dust, and handle disposal efficiently will make the process much smoother. If you need assistance with drywall removal or other junk removal services, Clutter Ninjas Junk Removal in Magnolia is here to help. With our expertise and commitment to customer satisfaction, we can make your renovation project as hassle-free as possible. Reach out to us at 936-262-1999 or email sborne@clutterninjas.com for more information.