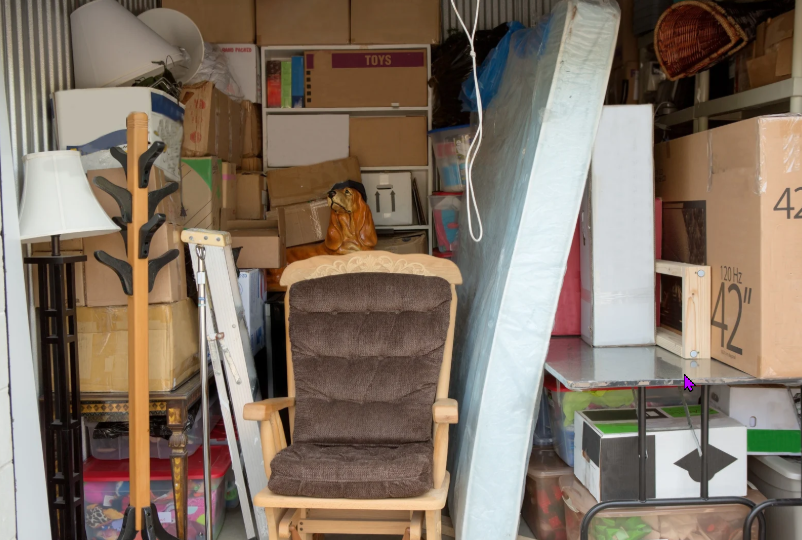
Storage units—often the quiet and forgotten corners of our homes, businesses, or lives—are repositories for years of accumulated clutter. Whether it’s furniture, seasonal decorations, documents, or things you forgot you even owned, these spaces can quickly turn into overwhelming collections of forgotten memories and obsolete items. While the idea of cleaning out a storage unit can be daunting, it doesn’t have to be. With the right approach, your storage unit cleanout can be efficient, stress-free, and even therapeutic.
This guide will walk you through best practices for storage unit cleanouts, offering tips, strategies, and the step-by-step process to help you regain control over your space. By understanding how to tackle the cleanout process, you’ll not only declutter your life but also create a cleaner, more organized environment.
Planning and Preparation: Setting the Stage
Before diving in, it’s crucial to prepare adequately. Storage units, large or small, can be deceptively packed, and rushing in without a plan can make the task feel insurmountable.
Start by scheduling a time for the cleanout. It might sound trivial, but ensuring you have dedicated time to focus on the task will keep distractions at bay. Storage cleanouts often require several hours or even days, depending on how packed your unit is. Think about whether you need extra hands for help, particularly if you’re dealing with large furniture or heavy items.
Gather essential supplies. You will need boxes for sorting, heavy-duty trash bags, a pair of gloves, cleaning supplies, and possibly a dolly or cart for moving large items. Having everything within arm’s reach will streamline the process, preventing interruptions to your flow.
Sorting Items: The Core of the Cleanout
Once you’ve opened the doors to your storage unit, it can be overwhelming to stare at the disarray of items. The first step here is sorting. This process can be broken down into four categories:
- Keep: These are items you want to hold on to for practical, sentimental, or financial reasons. Perhaps you want to store them in another part of your home or pass them on for future use.
- Donate: Many storage units contain items that are perfectly functional but no longer needed. Clothing, furniture, household goods, and even electronics often fall into this category. By donating, you’re not only making space but also helping others in need.
- Sell: Maybe there are items of value—vintage furniture, rare collectibles, or equipment—that you can sell. Whether you’re using online marketplaces like eBay or hosting a garage sale, make sure to clean these items first to present them in the best possible light.
- Dispose: This category is for everything that’s broken, obsolete, or in a condition that makes it impossible to repurpose. This could include items like old cardboard boxes, broken furniture, or expired products. It’s crucial to dispose of these items responsibly by recycling where possible or scheduling a junk removal service.
As you begin, tackle one category at a time. Starting with the easiest group, like the donate pile, can give you a sense of accomplishment early in the process and motivate you to keep going.
Organizing and Packing: The Key to Keeping It Tidy
The goal of a storage cleanout is not just to clear out space but to create a more organized, functional environment. After sorting, it’s time to move into the organizing phase.
Begin by categorizing your “keep” items. Consider how often you use these items and how easily they can be accessed. For example, seasonal decorations should be placed in clearly labeled boxes and stacked in a way that makes sense for seasonal access. Tools and outdoor equipment should be kept together and placed toward the back of the unit for easier retrieval when needed.
When packing your items into boxes or containers, always make sure they’re sealed tightly and clearly labeled. For fragile or valuable items, use bubble wrap, old newspapers, or blankets to protect them. Creating a system that works for you—whether that means grouping like items or using a more categorized approach—will make future visits to your unit easier.
Cleaning and Maintenance: Preparing for the Future
Once you’ve emptied out the majority of the storage unit, it’s time to clean. After all, a clean unit ensures that your items remain in good condition and reduces the chances of dust or pests making a home in your belongings.
Sweep out dirt and debris from the floors, wipe down shelves, and check for any signs of pests. Some storage units are notorious for attracting rodents or insects, so ensure there’s no visible damage or signs of infestation. You may even want to consider using a dehumidifier or moisture-absorbing products if your storage unit is in a particularly damp area.
If you’re keeping your storage unit, it’s worth doing routine maintenance. Organize the unit regularly to prevent it from returning to its cluttered state. Set a reminder every few months to revisit and reorganize the space.
Dealing with Large or Hazardous Items
Some items in your storage unit might require more specialized handling, such as large furniture, chemicals, or hazardous materials. When cleaning out a storage unit, it’s important to follow safety protocols to handle these types of items responsibly.
For large furniture or heavy items, enlisting the help of friends or professionals can ensure that you don’t hurt yourself while lifting and moving. If you need to dispose of any electronics, furniture, or appliances, research local recycling programs or junk removal services that specialize in large items.
If your unit contains hazardous materials such as old paint, batteries, or cleaning chemicals, don’t just throw them away. These materials require special disposal methods to prevent harm to the environment. Contact local disposal centers or hazardous waste programs to ensure safe removal.
Hiring Professional Help: When to Call in the Experts
While DIY cleanouts are manageable for many people, there are times when calling in a professional junk removal service makes sense. If your storage unit is packed to the brim with items that you can’t easily sort through, or if you find yourself overwhelmed, professional help can save you time and energy.
Professional junk removal companies specialize in large-scale cleanouts and can help with everything from sorting and organizing to hauling items away. They’ll also know how to handle hazardous materials and large items safely.
Hiring experts can also be beneficial if you need to clear the unit in a hurry. Many junk removal companies offer same-day or next-day service, making them ideal for those with time-sensitive cleanouts.
Making it a Regular Practice
Once your storage unit is cleaned out and organized, it’s tempting to let things slide back into disarray. However, it’s important to commit to making storage unit cleanouts a regular practice. Consider doing periodic cleanups to ensure that you don’t let things pile up again.
A useful rule of thumb is to revisit your storage unit at least twice a year. At the start of each season, evaluate whether you’re storing items that are truly necessary. Also, keep your storage unit’s cleanliness in check by ensuring it’s pest-free, dry, and organized.
By making regular cleanouts part of your routine, you’ll prevent clutter from building up and maintain the functionality of your storage unit.
Start with a Plan: Organizing Your Storage Unit Cleanout
Before diving into your storage unit cleanout, it’s essential to have a solid plan. Begin by sorting items into categories like keep, donate, or dispose of. This will streamline the process and help you stay focused. Planning ahead also minimizes wasted time and energy.
Creating a layout for your cleanout allows you to tackle the job more efficiently. Consider using bins, labels, or color-coding to keep everything organized. This systematic approach ensures you don’t miss anything important, and you’ll be able to navigate the cleanup process with ease.
Sort and Prioritize Items for Efficient Cleanout
When cleaning out a storage unit, start by prioritizing what’s most important. Begin with the items you know are worth keeping, such as documents or valuable personal belongings. Donate or recycle items that are no longer necessary, and dispose of anything damaged beyond repair. This ensures that valuable space is cleared out.
Prioritizing will also help prevent over-accumulation of unnecessary belongings. Focusing on the essentials allows you to clear the clutter quickly and keep your unit tidy. Once the cleanup is complete, consider organizing the remaining items into boxes or shelves to maintain a clutter-free space.
Disposal and Donation: What to Keep What to Toss
When deciding what to keep, donate, or toss, make thoughtful decisions. Keep items that are functional, sentimental, or valuable. Donate anything that’s in good condition but no longer useful to you. Items that are broken or have no practical use should be tossed, helping to create more space in your storage unit.
After sorting, ensure that donations are dropped off at a local charity, and recyclables are taken to the proper facility. Proper disposal is key to maintaining an organized space. Remember to check with your local waste management services for guidelines on large-item disposal to avoid additional clutter.
Conclusion
A storage unit cleanout doesn’t have to feel like a daunting task. With careful planning, sorting, and regular maintenance, you can easily stay on top of the process and create a more organized, functional space. If you find yourself struggling with large or overwhelming cleanouts, professional junk removal services can help ease the burden and ensure that your items are disposed of or donated properly.
For those in need of reliable junk removal services, Clutter Ninjas Junk Removal is ready to assist. Based in Magnolia Clutter Ninjas can help with storage unit cleanouts, junk removal, and much more. Contact them at 936-262-1999 or via email at sborne@clutterninjas.com for more information.