Decks have a way of showing their age. One day, they’re where the family gathers for a barbecue; the next, they’re splintering, sagging, and pulling away from the house. When that moment arrives, homeowners face the inevitable decision: remove it. But tearing out a deck isn’t just about brute force and crowbars. It’s a process that, when handled thoughtfully, can save time, money, and stress.
There’s no need to panic if your deck is ready to come down. What may seem like a daunting project becomes far more manageable with the right approach. Understanding how to handle the removal—what tools to use, what steps to follow, and how to stay safe—is the key to moving forward. And once it’s gone? You’ve got a blank canvas to create something even better.
Spotting the Signs It’s Time to Let Go
A few creaky boards are nothing new, but when the structural integrity of your deck begins to crumble, it’s more than a minor inconvenience. Loose railings, soft spots, and discolored joists aren’t just cosmetic issues—they’re red flags. Water damage, rusting fasteners, and wood rot are signs that your deck may no longer be safe.
Don’t wait for a board to give way before taking action. Deck removal is often the safer and smarter route when repairs become too frequent or costly. Trying to patch things up repeatedly only delays the inevitable and can cost more in the long run. The moment your deck feels more like a hazard than a haven, it’s time to act.
Planning Before the First Swing
It’s tempting to grab a sledgehammer and start swinging, but planning saves headaches. Before tearing anything apart, assess the deck’s construction. Is it freestanding or attached to the house? Does it have electrical wiring or lighting? These elements change the process and can introduce risks if overlooked.
Call in a professional if you’re unsure about what lies beneath or behind those boards. Permits might be required in some locations, especially if your deck is large or connected to other structures. Always check local regulations before beginning any major removal. A few phone calls now can save a mountain of frustration later.
Gathering the Right Tools for the Job
You wouldn’t attempt surgery with a butter knife—and deck removal is no different. The proper tools make the difference between a weekend project and a week-long headache. Pry bars, drills, hammers, safety goggles, gloves, and a reciprocating saw are typically essential. For larger decks, a wheelbarrow or dolly might be useful for hauling debris.
Remember that safety is more than gear—it’s awareness. Watch out for exposed nails, sharp splinters, and heavy beams that can shift unexpectedly. Stay clear of collapse-prone sections. Work methodically, starting from the top down. It’s not glamorous, but it’s how you keep both your project and yourself intact.
Removing Deck Boards Without Damaging Surroundings
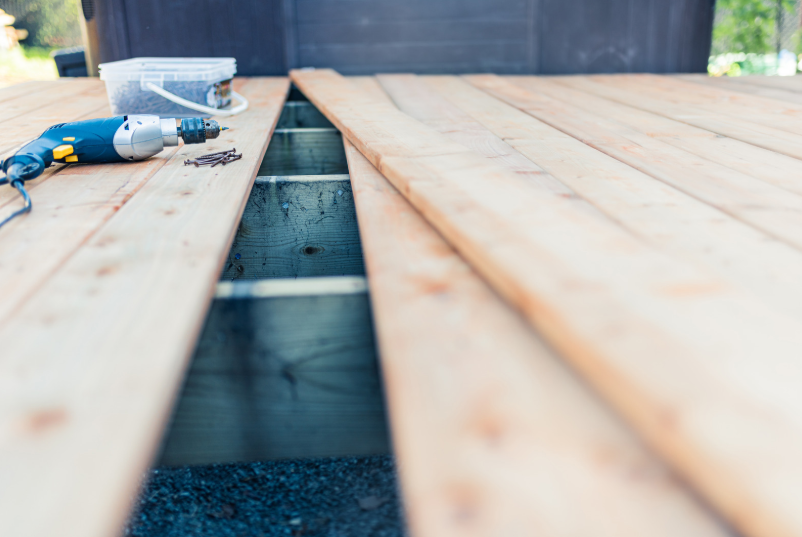
The boards are where you begin. They’re usually nailed or screwed into place, and removing them carefully avoids damaging nearby structures. Start at one end and work across in sections, lifting slowly to reduce snapping or splintering. Keep an eye out for hidden fasteners—those can catch you off guard.
If the boards are salvageable, removing them intact lets you repurpose the wood or donate it. Even damaged boards can sometimes be recycled. The less you send to the landfill, the better. Sustainable disposal is one of the most overlooked parts of removal, but it’s worth the extra thought.
What to Do With the Frame and Posts
Once the surface boards are gone, the real bones of the deck show. The framing and posts carry the structure’s weight, and they’re usually secured more deeply than the boards. Lag bolts and cement footings often anchor them in place, so don’t expect them to budge easily.
Cut the framing into manageable sections before trying to lift it. If posts are sunk into concrete, you may need to dig or break up the surrounding material. It’s heavy work, but rushing leads to mistakes. Break things down piece by piece, working in a way that keeps the site clean and the workload reasonable.
Managing the Mess Without Losing Your Mind
Deck removal creates a surprising amount of debris. Boards, fasteners, concrete chunks, and dust seem to multiply as you go. Staying organized helps reduce the chaos. Create piles based on material type—metal, wood, and concrete—and set aside anything that can be recycled or reused.
Schedule a junk removal service if your vehicle can’t handle the load. Professional crews can remove the material quickly and responsibly, saving you multiple trips to the landfill. It’s not just about convenience—it’s about knowing your debris is being disposed of properly.
Understanding the Environmental Side of Deck Disposal
Old decks might look like trash, but a lot of that material has another life. Treated wood, if disposed of improperly, can leach chemicals into the ground. Screws, brackets, and other hardware are often recyclable. Even concrete can be crushed and repurposed.
Taking the time to sort materials isn’t just good for the environment—it’s smart homeownership. You’re reducing your carbon footprint while also possibly saving money on disposal fees. A sustainable approach to removal starts with how you think about the pieces you’re tearing down.
The Hidden Hazards You Shouldn’t Ignore
Removing a deck seems straightforward until you hit a snag—like unexpected wiring or a nest of pests beneath the beams. Wasps, hornets, and even rodents sometimes make abandoned decks their home. You’ll also want to watch for mold or mildew, especially if water has been pooling.
If you find anything suspicious, pause and assess. Some issues, like extensive black mold or active wiring, require a pro. Deck removal isn’t always DIY. Knowing your limits doesn’t mean giving up—it means being smart. Staying safe beats cutting corners every time.
Preparing for What Comes After
Once the dust clears and the last board is gone, what’s next? Many homeowners opt for a new deck, patio, or even a garden. This is your chance to reimagine the space. Maybe it’s a fire pit, an outdoor kitchen, or simply a clean yard for the kids to play.
Before rebuilding, inspect the ground underneath. Level it out, address any drainage issues, and fill in holes left by the old structure. Proper site prep sets the tone for whatever you plan to do next. It’s not just cleanup—it’s laying the groundwork for something better.
The Role of Professional Junk Removal in Deck Demolition
Even if you handle the teardown yourself, dealing with the mess is another story. A trusted junk removal service can swoop in and handle the aftermath. From lifting heavy beams to sweeping the last nail, these pros simplify what’s often the messiest part of the job.
It’s not just about muscle—it’s about method. Experienced crews know how to navigate narrow yards, avoid damage to lawns or driveways, and dispose of all materials legally. Hiring the right team turns your demo from an ordeal into a smooth transition. That peace of mind is well worth investing in.
Final Thoughts on Doing It Right
Deck removal doesn’t have to feel overwhelming. With a bit of prep, the right tools, and a clear plan, you can take down that aging structure without drama. Whether you DIY or call in a crew, the goal is the same—clearing the old to make space for something new.
It’s one of those projects that starts with a hammer and ends with possibilities. Don’t let splintered wood or rusty bolts stop your progress. Approach it with focus, caution, and creativity. And when the last board is hauled away, you’ll be surprised how good it feels to start fresh.
Why You Might Need to Remove Your Deck
Decks age over time, becoming worn, unstable, or even unsafe. Rotting wood, rusted nails, and shifting foundations can all be signs that it’s time for removal. Whether you’re upgrading to a new outdoor space, making room for landscaping, or increasing property value, removing an old deck can be the first step toward a better, safer backyard environment.
Tools and Materials You’ll Need
Before getting started, gather the right tools: a crowbar, hammer, drill, pry bar, circular saw, safety goggles, gloves, and a dumpster or hauling method. Having the proper equipment not only makes the job easier but also keeps you safe. Make sure to inspect the deck beforehand to understand what materials it’s made of and whether nails or screws were used during construction.
Step-by-Step Deck Removal Process
Start by removing railings and stairs, then take up deck boards using a pry bar or drill. After that, disassemble the frame by cutting through joists and beams. Finally, dig out or cut the support posts from the ground. Be sure to keep safety in mind throughout the process, especially when dealing with heavy wood or elevated structures. Dispose of materials responsibly.
Conclusion
Tearing out an old deck might seem like a backbreaking task at first, but it’s often the first move toward transforming your outdoor space into something truly enjoyable. From recognizing when it’s time to remove it to handling every board with care, the process rewards those who approach it with patience and planning. Every splinter cleared, every beam hauled away, is a step closer to reclaiming your yard and making it functional again.
And if it starts to feel like too much? There’s a team ready to help. Professional junk removal services can take what once seemed like a weekend-long job and turn it into a quick, clean process. They’ve got the tools, the experience, and the eye for detail that ensure your property is respected and your goals are met. For expert support with deck removal and cleanup, reach out to the team in Magnolia by phone at 936-262-1999 or via email at sborne@clutterninjas.com.